# Dust Permit Project Site Map
The fee for your dust permit application will be calculated by using the Disturbed Area acreage that you will draw within this map. You must draw your project site map using the GIS technology. Uploading an attachment site map will not let you proceed with submitting the application.
To complete your project site map, the following features are required: the total Disturbed Area and at least one Access Point.

# Dust Generating Activities
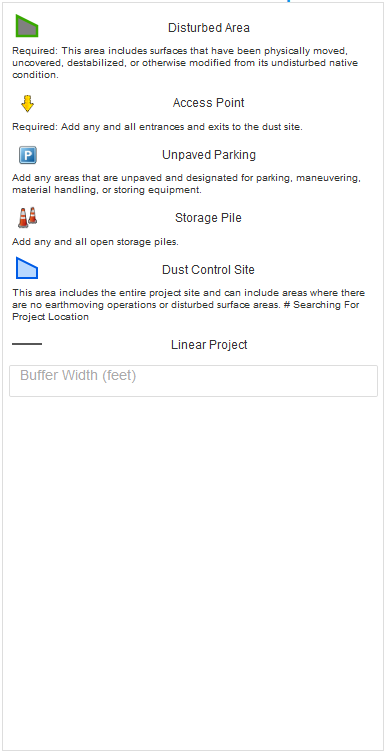
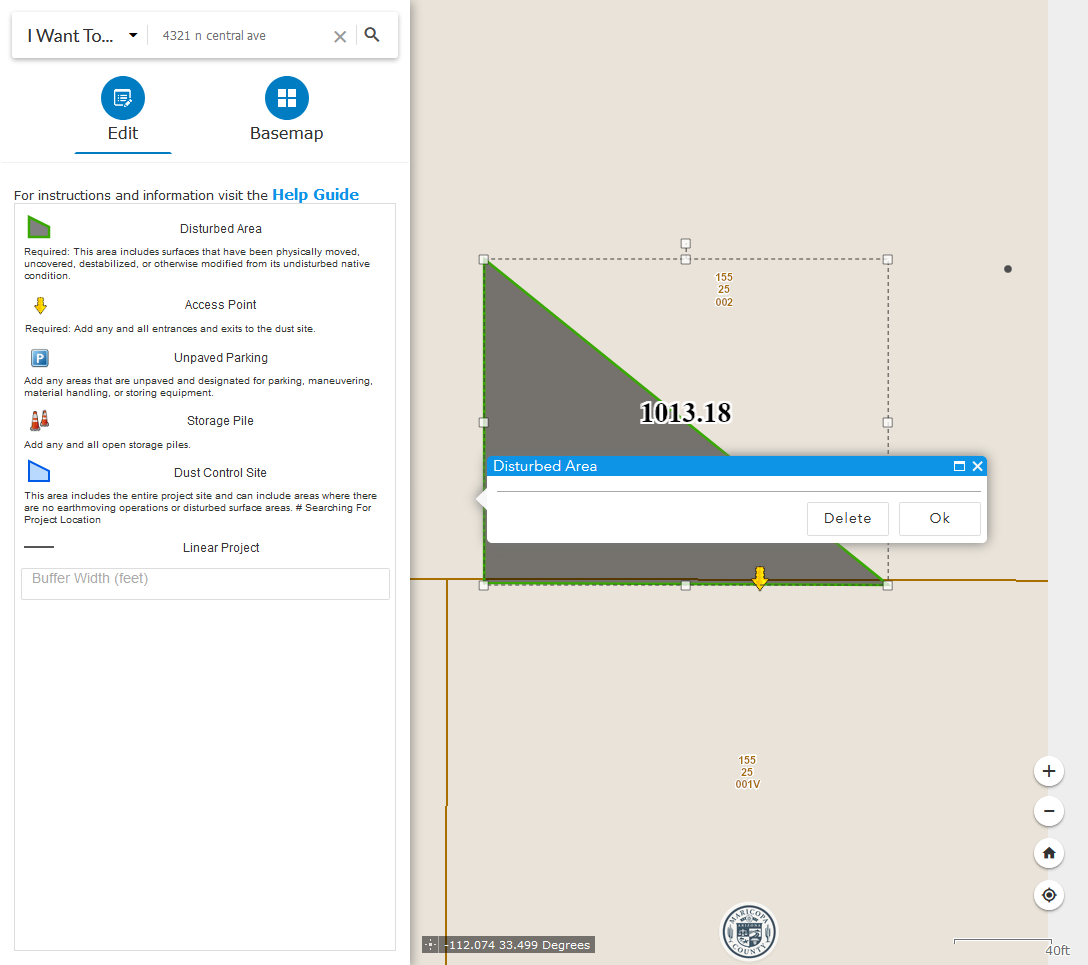
 Disturbed Area - Required
This area includes surfaces that have been physically moved, uncovered, destabilized, or otherwise modified from its undisturbed native condition. When selected, right clicking a parcel will create a disturbed area matching the parcel selected.
 Access Points - Required
Add any and all entrances and exits to the dust site.
 Unpaved Parking
Add any areas that are unpaved and designated for parking, maneuvering, material handling, or storing equipment.
 Open Storage Piles
Add any and all open storage piles.
 Dust Control Site
This area includes the entire project site and can include areas where there are no earthmoving operations or disturbed surface areas. When selected, right clicking a parcel will create a dust control area matching the parcel selected.
 Linear Project
Linear Projects are a unique type of Disturbed Area. They are drawn as lines with a fixed width. When drawing, place the line down the center of the project.
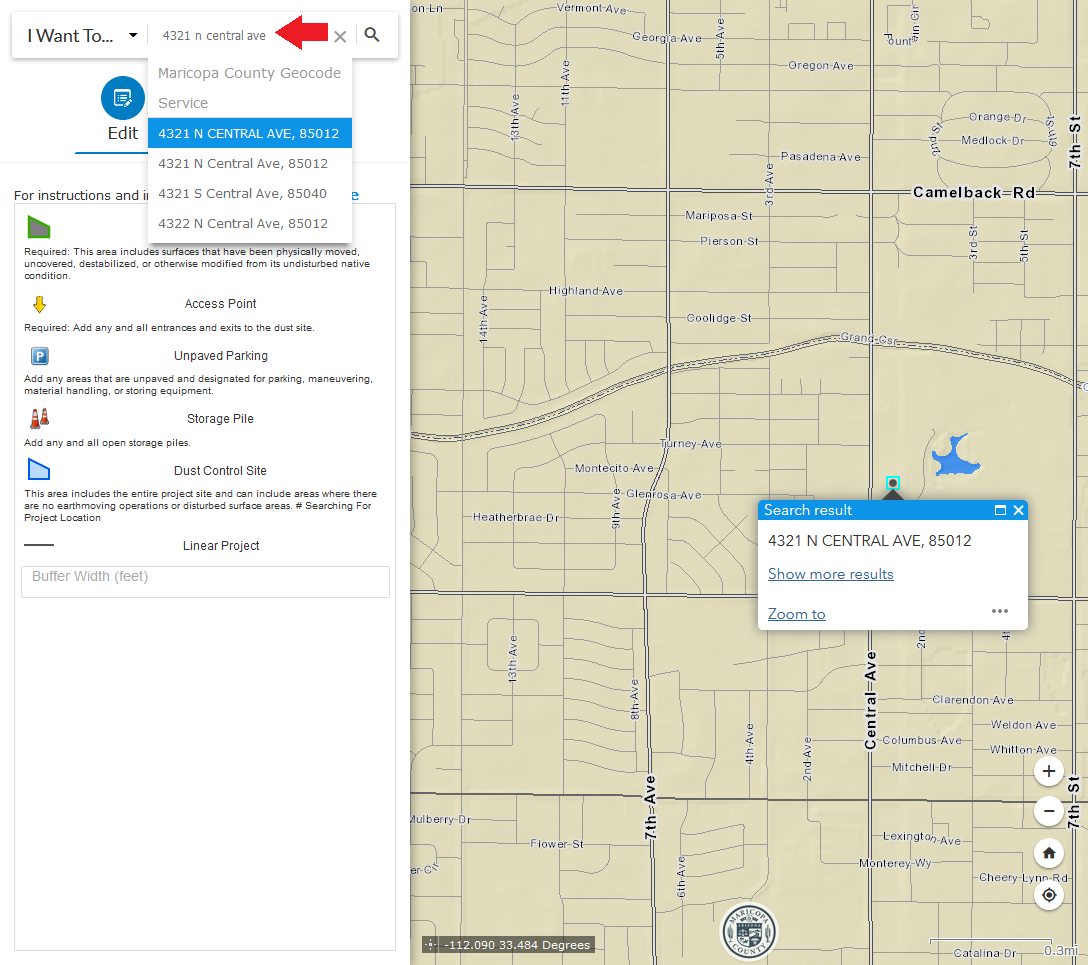
# Searching For Project Location On Map
Search for your project location or address by using the "I Want To..." search box. If your project location does not have an address, search for an address close to the project and move the map to find your location. After finding the project area, zoom in and reposition your screen to begin drawing.
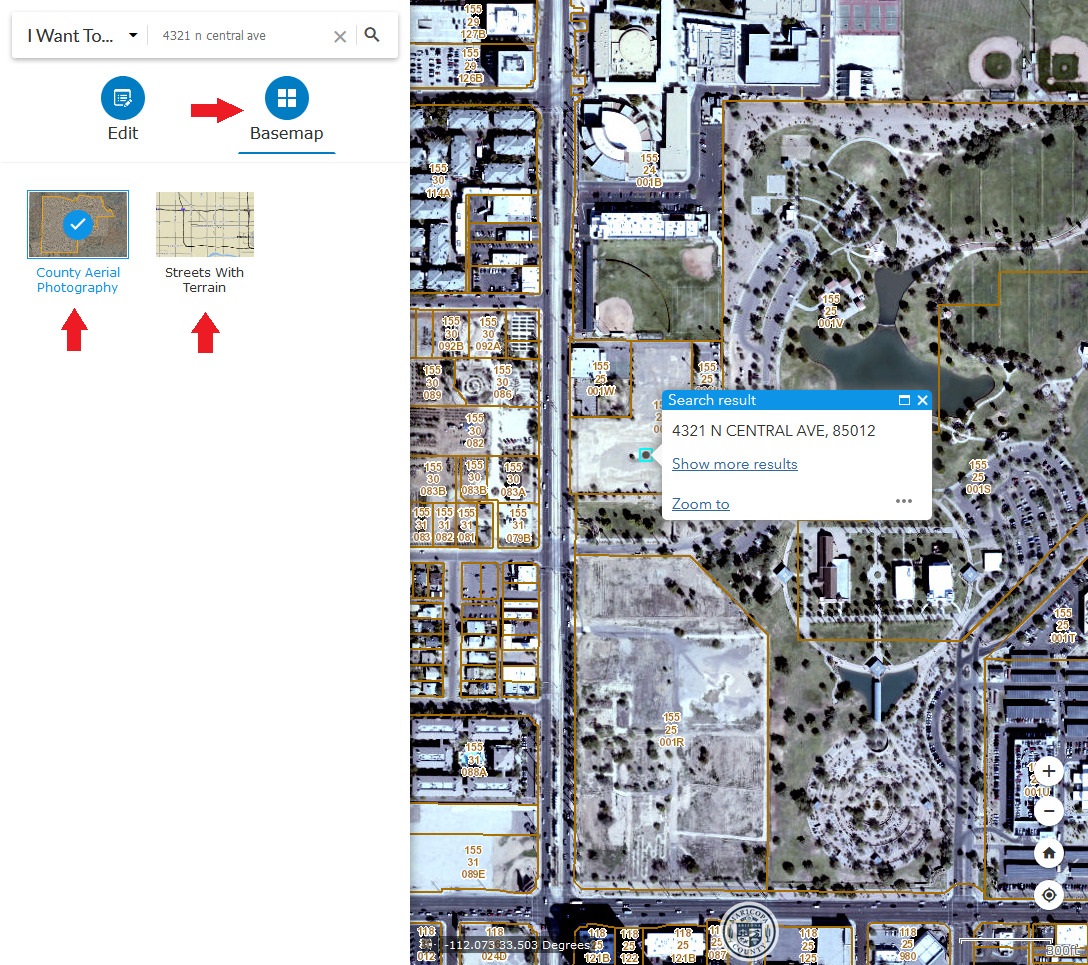
To get a satellite aerial view, select Basemap.
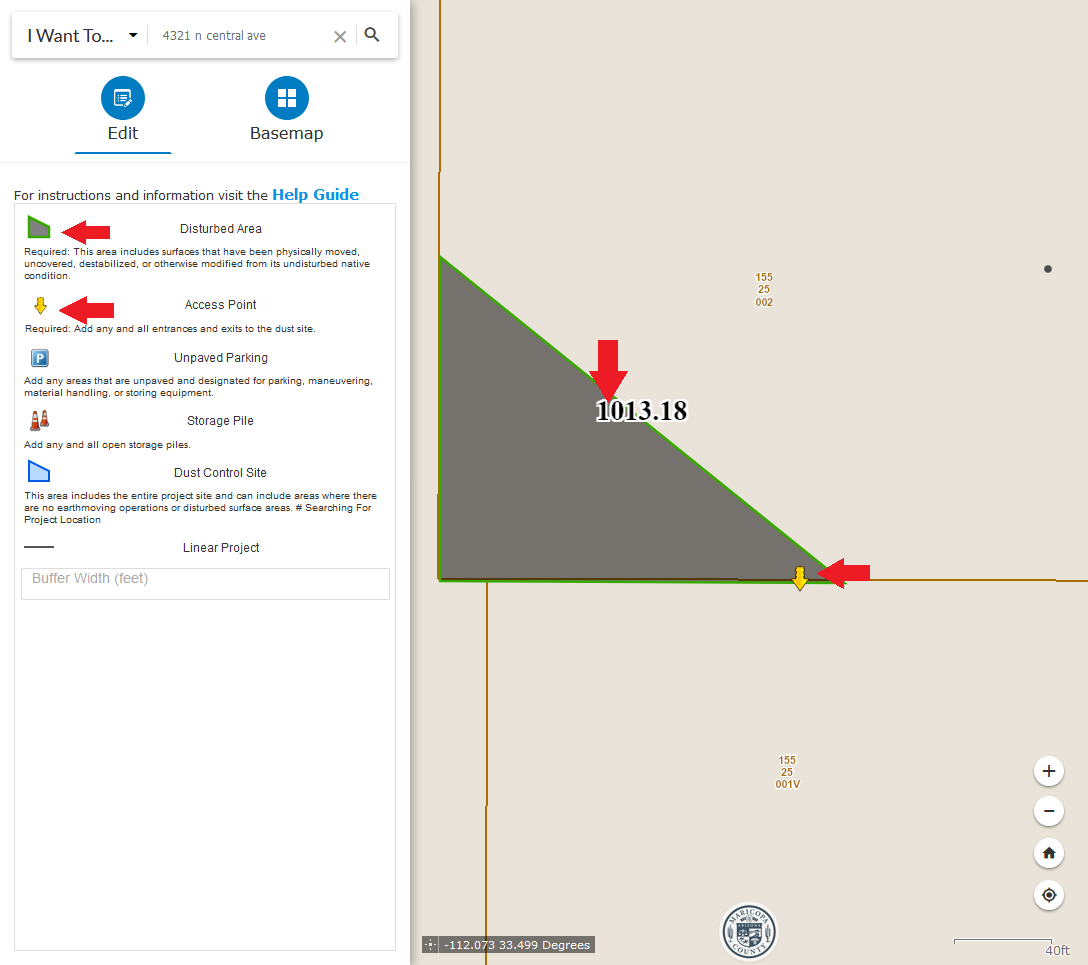
# Drawing Your Project Map
To add features onto your site drawing, select the desired icon on the left side of the screen. Your selection is indicated by the blue highlighting of the activity. Disturbed Areas and Dust Control Sites create polygons on the map, which is meant to represent the corresponding area for your site. To create a polygon (site drawing), begin by clicking once on the map to create a new point. The distance drawn is shown in feet within the dialog box. Drag your mouse to next point in the polygon and click again. After three or more points have been made to create a polygon, you may double click to save the polygon. The total acreage of the polygon is displayed. Alternatively, if you can right click on a parcel and a matching polygon will be created.
To add an access point, unpaved parking area, or storage pile, simply select the desired icon, and then click on the site drawing to drop the icon.
To delete an activity, click on its location in the map and select delete from the pop-up.
Once your site drawing is completed, select Save and Close located at the bottom of the screen. To cancel without saving, press the keyboard ESC key.